BOOST YOUR CURB APPEAL!

CURB APPEAL

When you’re selling a house, you don’t want potential buyers to drive by and keep on going. But if your home doesn’t have curb appeal—if it doesn’t look so great on the outside that people have to stop and take a look—that’s exactly what’s going to happen.

“A home’s curb appeal is always critical, since it’s the first impression for potential buyers,” says National Association of Realtors President Steve Brown, co-owner of Irongate, Inc., Realtors in Dayton, Ohio. “That’s why exterior replacement projects offer the greatest bang for the buck. Projects such as entry door, siding, and window replacements can recoup homeowners more than 78 percent of costs upon resale.”

But don’t freak out and exclaim, “I can’t afford to replace my windows and siding.” Oftentimes improving curb appeal can mean just doing a few small projects that can have a large impact. Many don’t cost a lot of money.

I spoke with three real estate professionals for their suggestions on how to improve your home’s curb appeal on the cheap. Here are their tips.
•Wash the windows.
•Evaluate foundation plantings, and trim back or replace as needed.
•Update the light fixture at the front door.
•Repair or install a new mailbox.
•Replace window treatments inside the house if necessary. “Take a look at the window treatments in the rooms on the front of the house,” suggests DeeDee Bowman, a Realtor with Coldwell Banker Hearthside in Lahaska, PA. “How do they appear from the street or front walk? Update or eliminate if needed.”
•Repair the front walk if it is cracked or heaved.
•Remove dead tree and shrub branches.
•Mow the lawn.
•Power wash your house. Before you hire a professional for this service, check out the Windex Outdoor Multisurface Cleaner, which attaches to a garden hose. I used this product when I was selling my old house, and it cleaned up our vinyl siding and windows so easily.
•Clean the entryway, front lights, and walkway of cobwebs, tree debris, dust, dirt, etc.
•Add colorful, potted plants along your walkway or entryway. “You can often find smaller plants on sale at hardware stores, flower markets, or gardening and home improvement stores,” suggests Romunda Craft, a Realtor with Century 21 Imperial Realty in Daly City, CA. “Another alternative—small succulents planted together in larger containers.”
•Paint your front door. “Doors leave a first impression as you enter the home,” says Inez Tomonelli, a Realtor with Lyon Real Estate in Roseville, CA. “Be sure that it is clean, or even add a fresh coat of paint or new stain.”
•Clean and sweep the driveway.
•Store all yard equipment, including children’s toys.
•Find somewhere else to park any extra cars, boats, trailers, or RVs.
•Do not use the porch for storage.
•Clean up after your pets.
•Store garbage cans where they are not visible from the street.

Curb appeal is the difference that sells nearly half of all houses on the market, so says the National Association of Realtors. If you’re getting ready to sell yours, investing some time and a little bit of money in improving your home’s curb appeal seems like a no-brainer.

Leah Ingram’s favorite price is free! She is the author of 14 books, including two on frugal living. Her book Suddenly Frugal: How to Live Happier and Healthier for Less was just released as an audiobook. Leah is the founder of the popular frugal-living blog called Suddenly Frugal. Right now if you subscribe to Suddenly Frugal, Leah will send you an exclusive freebie. Each week here on Parade.com she’ll be covering different money-saving ideas. If you have an idea, let her know. In the meantime, follow her on Twitter @suddenlyfrugal and “Like” Suddenly Frugal on Facebook.

FALL CHECKLIST

fall checklist

1. Stow the mower.
If you’re not familiar with fuel stabilizer, it’s time. If your mower sits for months with gas in its tank, the gas will slowly deteriorate, which can damage internal engine parts. Fuel stabilizer ($10 for a 10-oz. bottle) prevents gas from degrading.
Add stabilizer to your gasoline can to keep spare gas in good condition over the winter, and top off your mower tank with stabilized gas before you put it away for the winter. Run the mower for 5 minutes to make sure the stabilizer reaches the carburetor.
Another lawn mower care method is to run your mower dry before stowing it.
1. When the mower is cool, remove the spark plug and pour a capful of engine oil into the spark plug hole. 2. Pull the starter cord a couple of times to distribute the oil, which keeps pistons lubricated and ensures an easy start come spring. 3. Turn the mower on its side and clean out accumulated grass and gunk from the mower deck.

2. Don’t be a drip.
Remove garden hoses from outdoor faucets. Leaving hoses attached can cause water to back up in the faucets and in the plumbing pipes just inside your exterior walls. If freezing temps hit, that water could freeze, expand, and crack the faucet or pipes. Make this an early fall priority so a sudden cold snap doesn’t sneak up and cause damage.
Turn off any shutoff valves on water supply lines that lead to exterior faucets. That way, you’ll guard against minor leaks that may let water enter the faucet.
While you’re at it, drain garden hoses and store them in a shed or garage.

3. Put your sprinkler system to sleep.
Time to drain your irrigation system. Even buried irrigation lines can freeze, leading to busted pipes and broken sprinkler heads.
1. Turn off the water to the system at the main valve. 2. Shut off the automatic controller. 3. Open drain valves to remove water from the system. 4. Remove any above-ground sprinkler heads and shake the water out of them, then replace.
If you don’t have drain valves, then hire an irrigation pro to blow out the systems pipes with compressed air. A pro is worth the $75 to $150 charge to make sure the job is done right, and to ensure you don’t have busted pipes and sprinkler head repairs to make in the spring.

4. Seal the deal.
Grab a couple of tubes of color-matched exterior caulk ($5 for a 12-oz. tube) and make a journey around your home’s exterior, sealing up cracks between trim and siding, around window and door frames, and where pipes and wires enter your house. Preventing moisture from getting inside your walls is one of the least expensive — and most important — of your fall maintenance jobs. You’ll also seal air leaks that waste energy.
Pick a nice day when temps are above 50 degrees so caulk flows easily.

5. De-gunk your gutters.
Clogged rain gutters can cause ice dams, which can lead to expensive repairs. After the leaves have fallen, clean your gutters to remove leaves, twigs, and gunk. Make sure gutters aren’t sagging and trapping water; tighten gutter hangers and downspout brackets. Replace any worn or damaged gutters and downspouts.
If you find colored grit from asphalt roof shingles in your gutters, beware. That sand-like grit helps protect shingles from the damaging ultraviolet rays of the sun. Look closely for other signs of roof damage (#5, below); it may be time for a roofing replacement.
Your downspouts should extend at least 5 feet away from your house to prevent foundation problems. If they don’t, add downspout extensions; $10-$20 each. 6. Eyeball your roof.
If you have a steep roof or a multistory house, stay safe and use binoculars to inspect your roof from the ground.
Look for warning signs: Shingles that are buckled, cracked, or missing; rust spots on flashing. Any loose, damaged, or missing shingles should be replaced immediately.
Black algae stains are just cosmetic, but masses of moss and lichen could signal roofing that’s decayed underneath. Call in a pro roofer for a $50-$100 eval.
A plumbing vent stack usually is flashed with a rubber collar — called a boot — that may crack or loosen over time. They’ll wear out before your roof does, so make sure they’re in good shape. A pro roofer will charge $75 to $150 to replace a boot, depending on how steep your roof is.

7. Direct your drainage.
Take a close look at the soil around your foundation and make sure it slopes away from your house at least 6 vertical inches over 10 feet. That way, you’ll keep water from soaking the soils around your foundation, which could lead to cracks and leaks.
Be sure soil doesn’t touch your siding.

8. Get your furnace in tune.
Schedule an appointment with a heating and cooling pro to get your heating system checked and tuned up for the coming heating season. You’ll pay $50-$100 for a checkup.
An annual maintenance contract ensures you’re at the top of the list for checks and shaves 20% off the cost of a single visit.
Change your furnace filters, too. This is a job you should do every 2 months anyway, but if you haven’t, now’s the time. If your HVAC includes a built-in humidifier, make sure the contractor replaces that filter.

9. Prune plants.
Late fall is the best time to prune plants and trees — when the summer growth cycle is over. Your goal is to keep limbs and branches at least 3 feet from your house so moisture won’t drip onto roofing and siding, and to prevent damage to your house exterior during high winds.
For advice on pruning specific plants in your region, check with your state extension service.

10. Give your fireplace a once-over.
To make sure your fireplace is safe, grab a flashlight and look up inside your fireplace flue to make sure the damper opens and closes properly. Open the damper and look up into the flue to make sure it’s free of birds’ nests, branches and leaves, or other obstructions. You should see daylight at the top of the chimney.

Check the firebox for cracked or missing bricks and mortar. If you spot any damage, order a professional fireplace and chimney inspection. An inspection costs $79-$500.

You fireplace flue should be cleaned of creosote buildup every other year. A professional chimney sweep will charge $150-$250

John_Riha John Riha
has written seven books on home improvement and hundreds of articles on home-related topics. He’s been a residential builder, the editorial director of the Black & Decker Home Improvement Library, and the executive editor of Better Homes and Gardens magazine.

Create the Perfect Photo Wall

Photos make our homes really feel like home. But there’s a trick to making it work so they look like a harmonious collection instead of  like random clutter.

Step 1: Choose a consistent organizing principle by keeping all your  frames the same color and the matte size uniform. Another idea: Print the photos  in black-and-white

Adam Glassman
Step 2: Arrange frames on kraft paper on the  floor, largest in the center, keeping a distance of two to three inches between  them. Trace each with a pencil.

Step 3: Tack the paper to the wall and hammer nails directly through it  for perfect placement; leave two to five inches between the collage and any  doorjambs

Photo Frames

Step 4: Hang scenic, airier shots up high, mix light and dark shots, and  keep all eyes—whether they’re human or giraffe—facing the center to create a  sense of balance

Framed Photos

BEAUTIFUL!!

Read more: http://www.oprah.com/home/How-to-Arrange-Photos-on-the-Wall/3#ixzz2WUMlf94i

10 Kitchen and Bath Trends to Watch This Year

gray kitchenundermountbath whitecabinets glassbacksplash

Shades of gray, quartz finishes, and energy efficiency are all growing in popularity in kitchens and baths this year, according to a National Kitchen & Bath Association survey of 2013 design trends.

NKBA reports that home owners this year are spending, on average, $47,308 on making over their kitchens, and $18,538 in bathrooms.

Here are the top 10 trends emerging from this year’s report for kitchens and bathrooms:

1. Gray color schemes

2. Quartz finishes for counter surfaces

3. Transitional styles — a blend of traditional and contemporary

4. White painted cabinetry in the kitchen

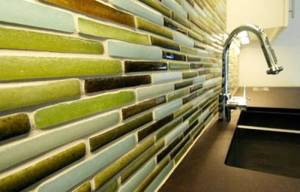
5. Glass blacksplashes

6. LED lighting

7. Touch-activated faucets

8. Satin-nickel finishes in kitchens

9. Ceramic or porcelain tile flooring

10. Undermount sinks in bathrooms

HOT COLOR PALETTES

may13_HD_colorpalettes

Let these four sets of colors—which take their cues from pop culture—inspire you.

May 2013 | By Meg White

2013 is a year of contrasts, according to Sherwin-Williams. Each year, the coating and color company releases a color forecast or “colormix.” SW’s most recent offering promises abundant diversity.

“We know that people gravitate to personal preferences, but we are being shaped by the divergent energies pulsing all around us,” says Jackie Jordan, director of color marketing. “Colormix 2013 embraces these conflicts and shows how colors are about a process of combination and creating unexpected harmony.”

Becky Spak, director of color marketing and design services, is part of the team that dreamed up the four themes present in this year’s colormix—Vintage Moxie, Honed ­Vitality, High Voltage, and Midnight Mystery. Spak takes trend cues from the fashion world, but she says the team of designers brings multiple influences to the table, from pop culture to the economy. “We draw inspiration from each other,” she says.

Home stagers in more conservative markets may want to steer clear of the wilder tones: “These are just a guide,” Spak says, “a source of inspiration.” Get acquainted with the influences behind each of the four palettes, and identify spots in a listing that could benefit from a splash of Moxie or Mystery.